Configure ActiveStorage with OpenStack can be a little bit tricky, this blog post explains how to configure it with OVH.
In this tutorial, we’re going to:
- Setup a private bucket on OVH
- Install and setup ActiveStorage OpenStack
- Configure user access
- Configure temporary url key, required by OpenStack
- 🍹
This setup has been tested on rails 6.x, but it should work with rails >= 5.2.2 (as specified in ActiveStorage::OpenStack gemspec)
1. Setup Object Storage on OVH Public Cloud
First, you have to create a new public cloud project in order to use Object Storage.
Follow this link in order to start. You should have the screen below 👇
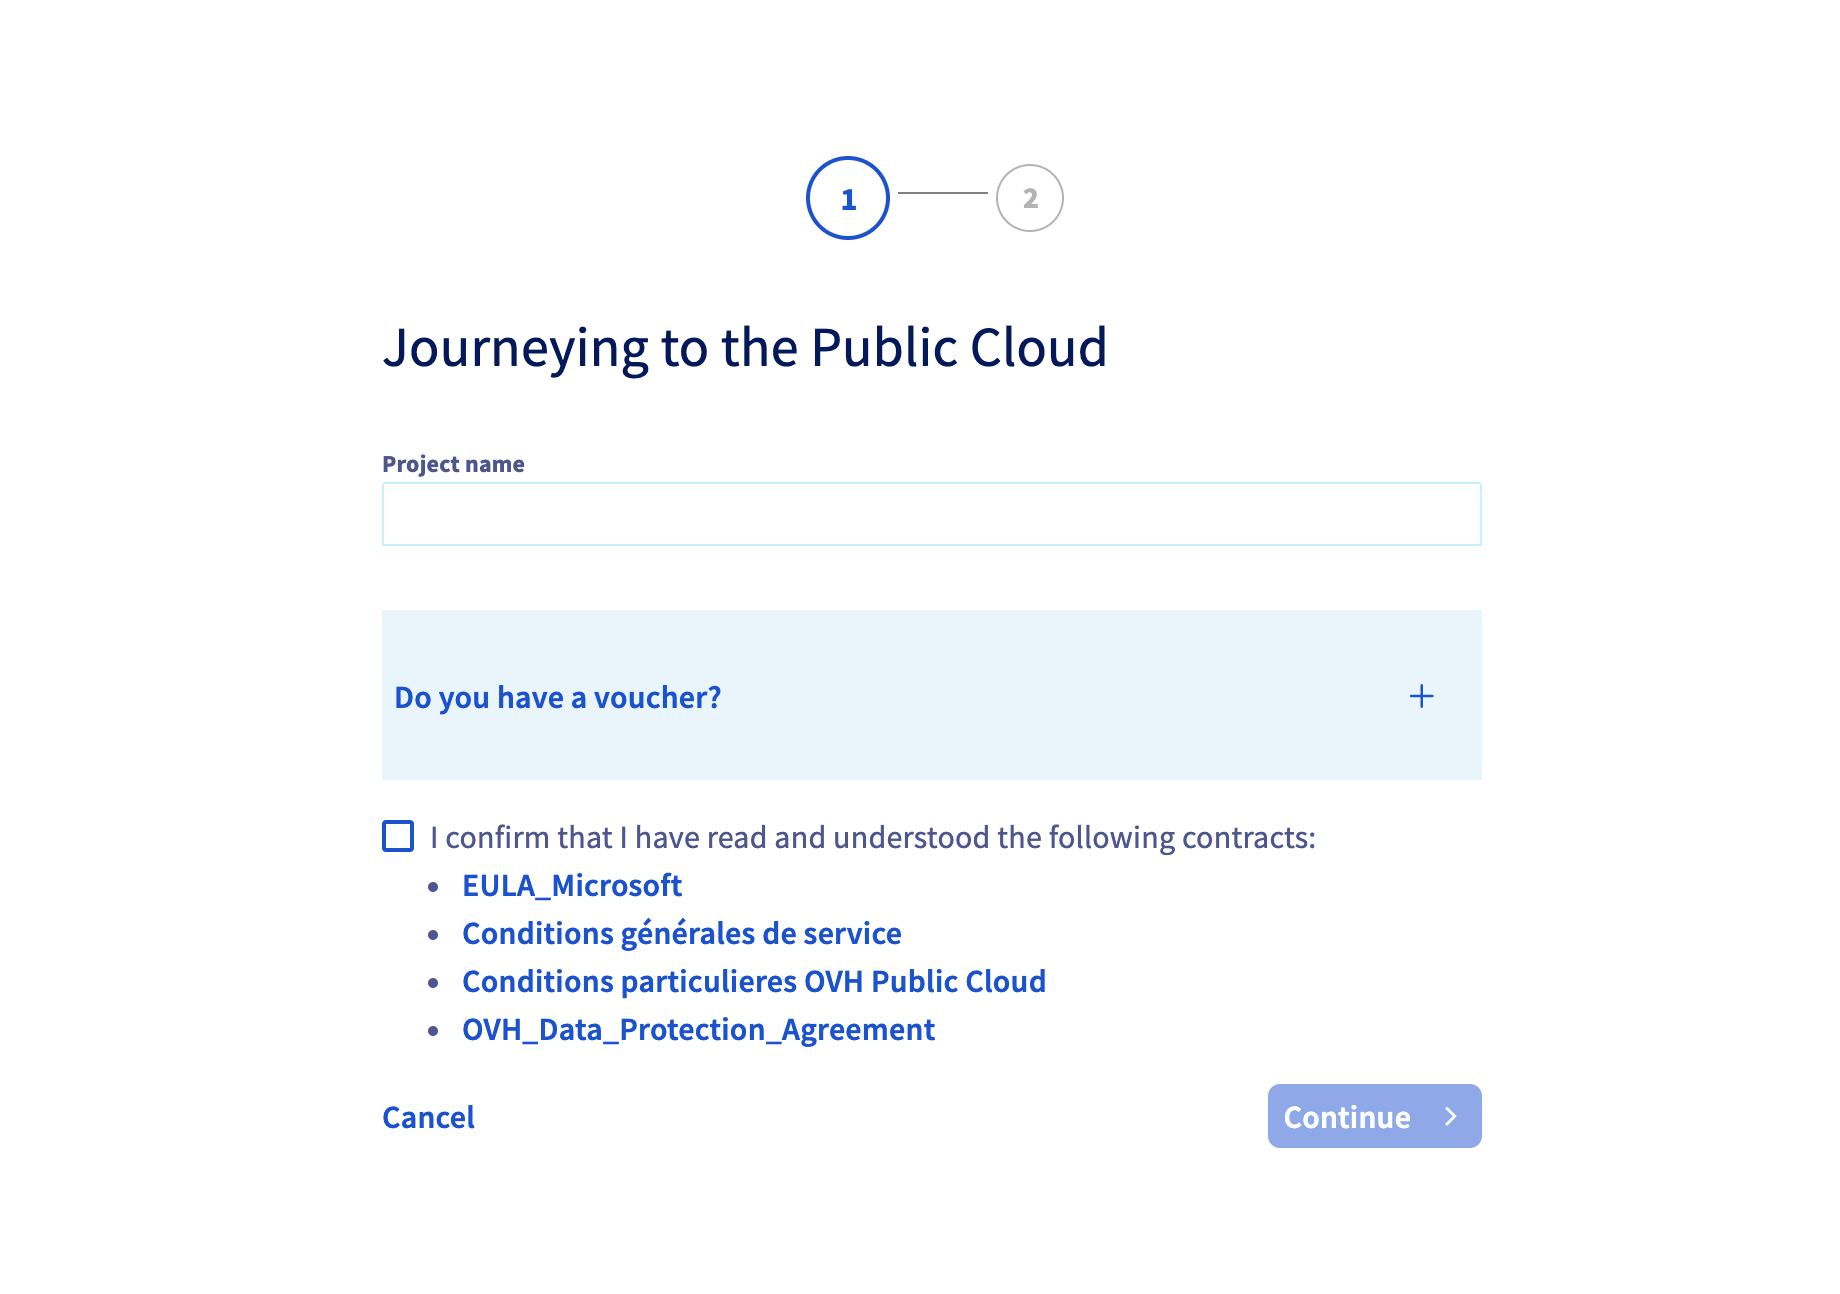
Enter a project name and a credit card in order to create your project.
When your new project is ready, click on the Object Storage link in the side panel.
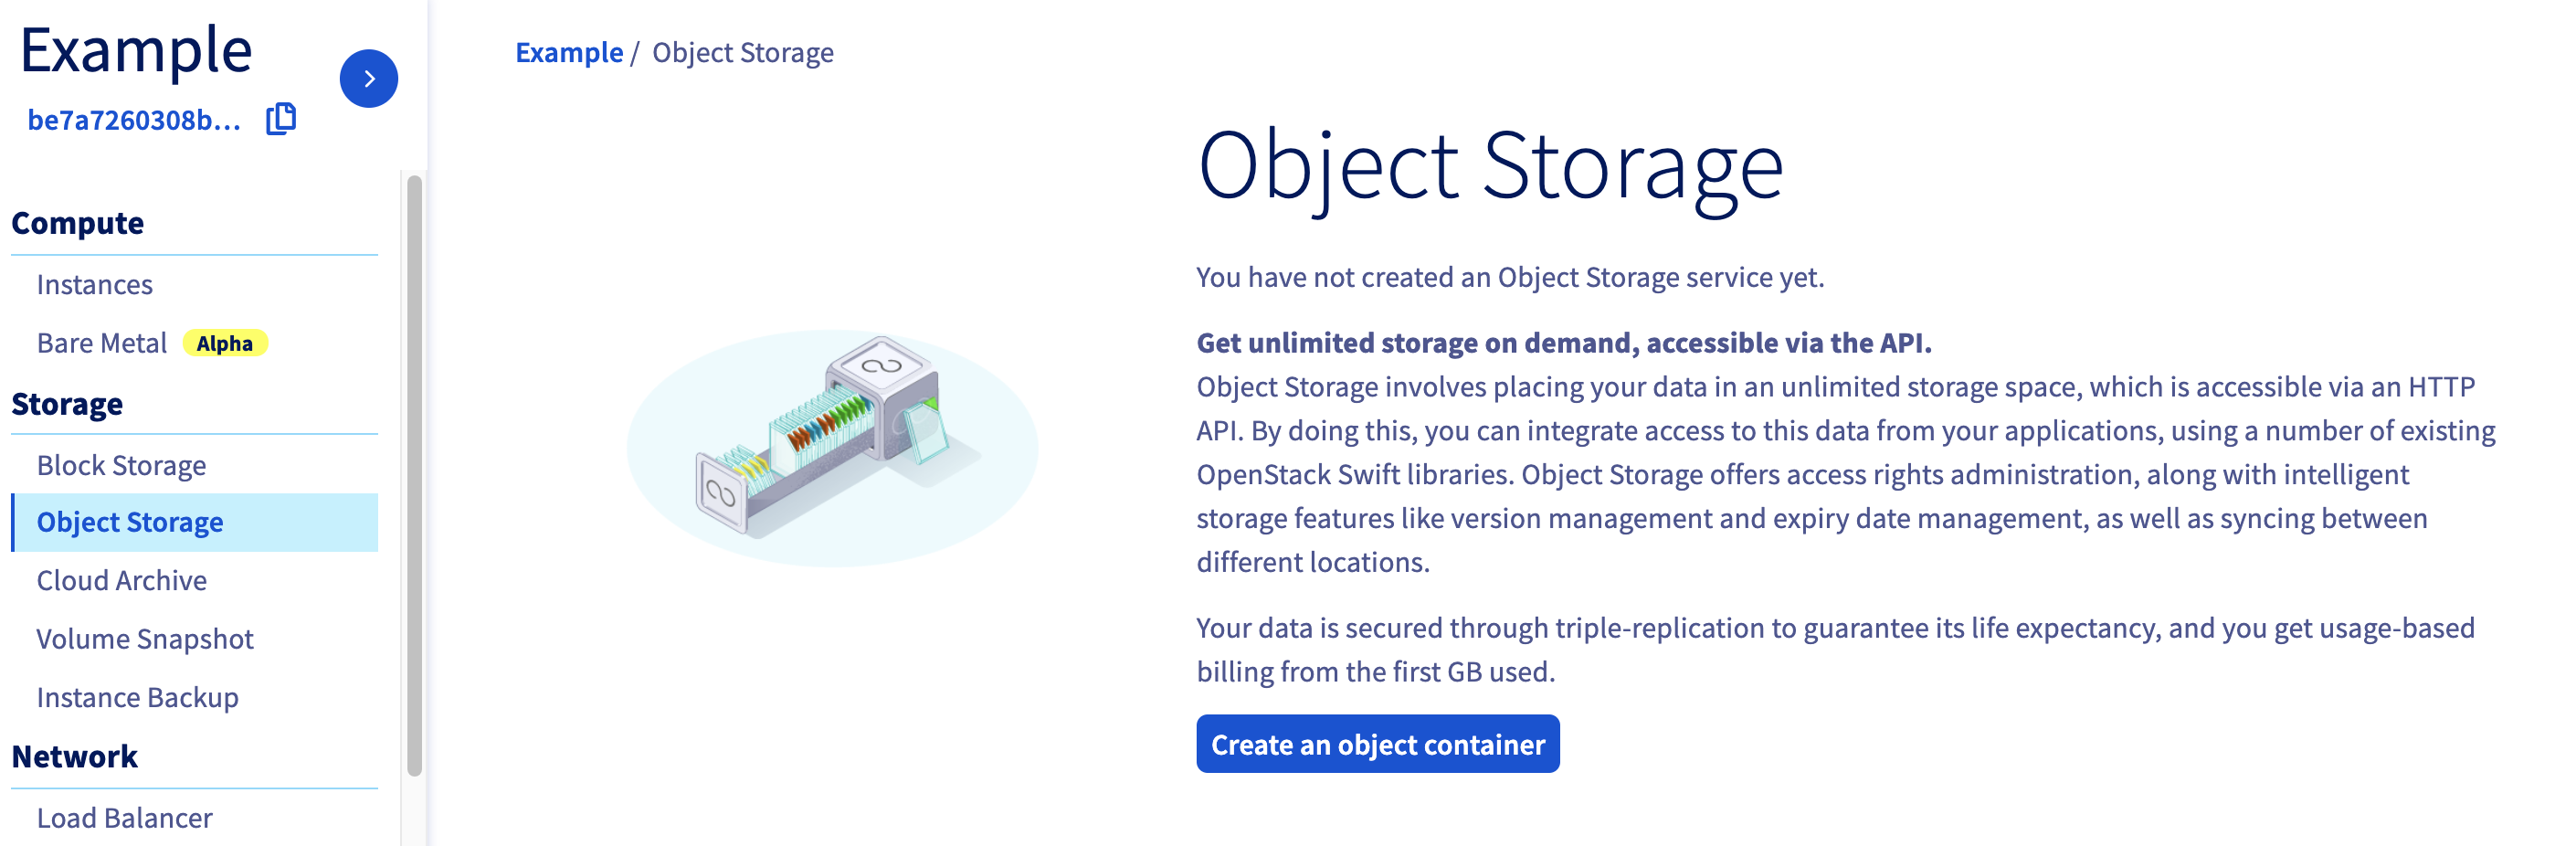
Click on the Create an object storage call to action, then:
- Choose a location (like Strasbourg (SBG))
- Choose a type of container (Private or Public)
- Choose a name for your container
For the example, I choose Strasbourg, a private bucket and
example-private-bucket as name :
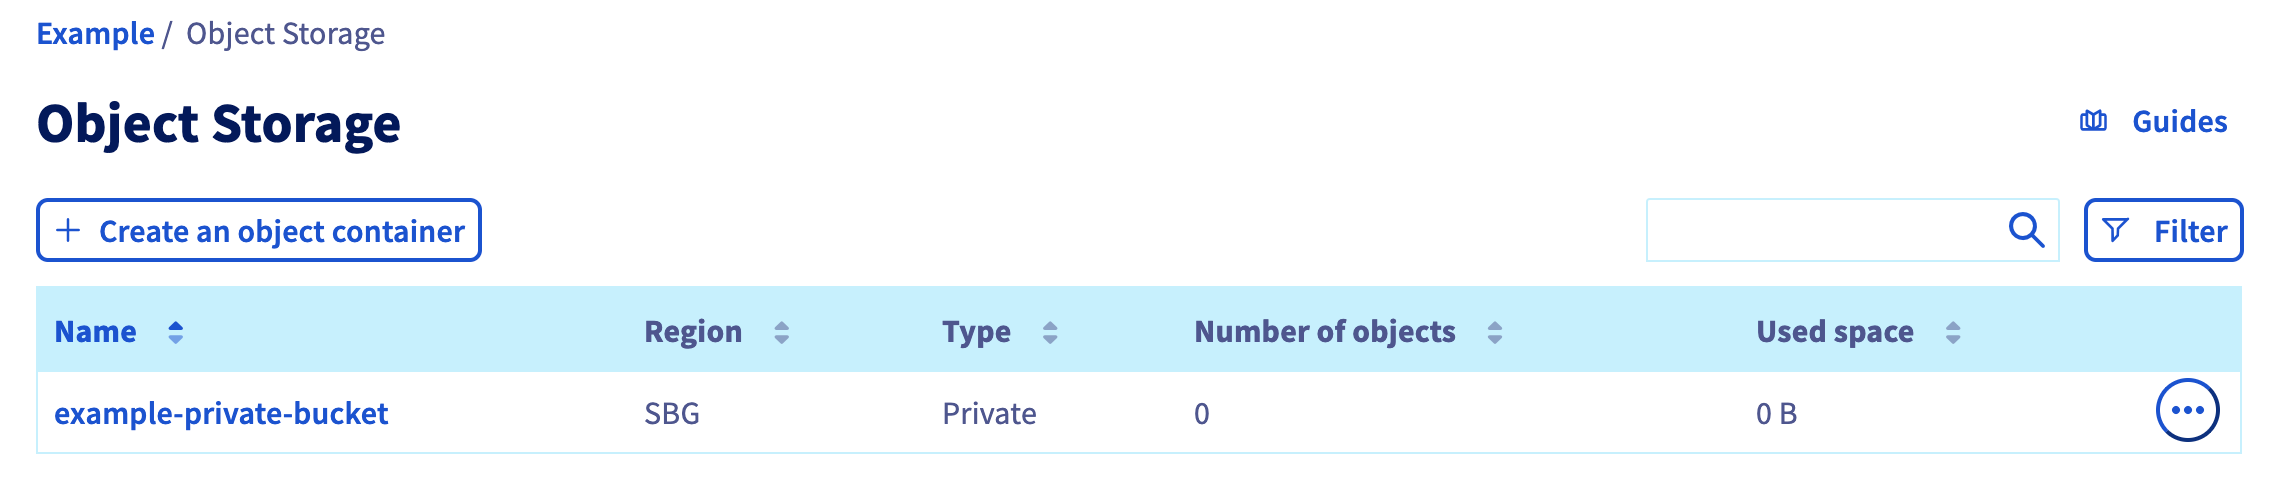
At this point you have created a bucket which can be used in ActiveStorage.
2. Install and configure ActiveStorage OpenStack
We’re going to use the ActiveStorage::OpenStack gem, which adds the openstack swift provider as an ActiveStorage service.
First, adds the gem in your Gemfile.
gem 'activestorage-openstack', '1.0'Then run bundle.
You can configure the config/storage.yml file now:
ovh:
  service: OpenStack
  container: 'example-private-bucket'                   # Your bucket's name
  credentials:
    openstack_auth_url: 'https://auth.cloud.ovh.net/'   # URL of the OVH auth url
    openstack_username: OVH_OPENSTACK_USER              # TBD in 2.
    openstack_api_key: OVH_OPENSTACK_PASSWORD           # TBD in 2.
    openstack_region: 'SBG'                             # The region acronym
    openstack_temp_url_key: OVH_OPENSTACK_TEMP_URL_KEY  # TBD in 3.
And in your environment file (for example in config/environments/production.rb):
config.active_storage.service = :ovhYou can find more information on basic configuration in the gem’s README
At this point, there’s still 2 steps to achieve:
- Configure a user access to our bucket (for
OVH_OPENSTACK_USERandOVH_OPENSTACK_PASSWORDvalues) - Setup the temporary url key (for
OVH_OPENSTACK_TEMP_URL_KEY)
3. Configure user access
Back to the OVH Public Cloud interface: you have to create a new user with an access to your private bucket.
You can achieve this by clicking on Users & Roles link in the side panel.
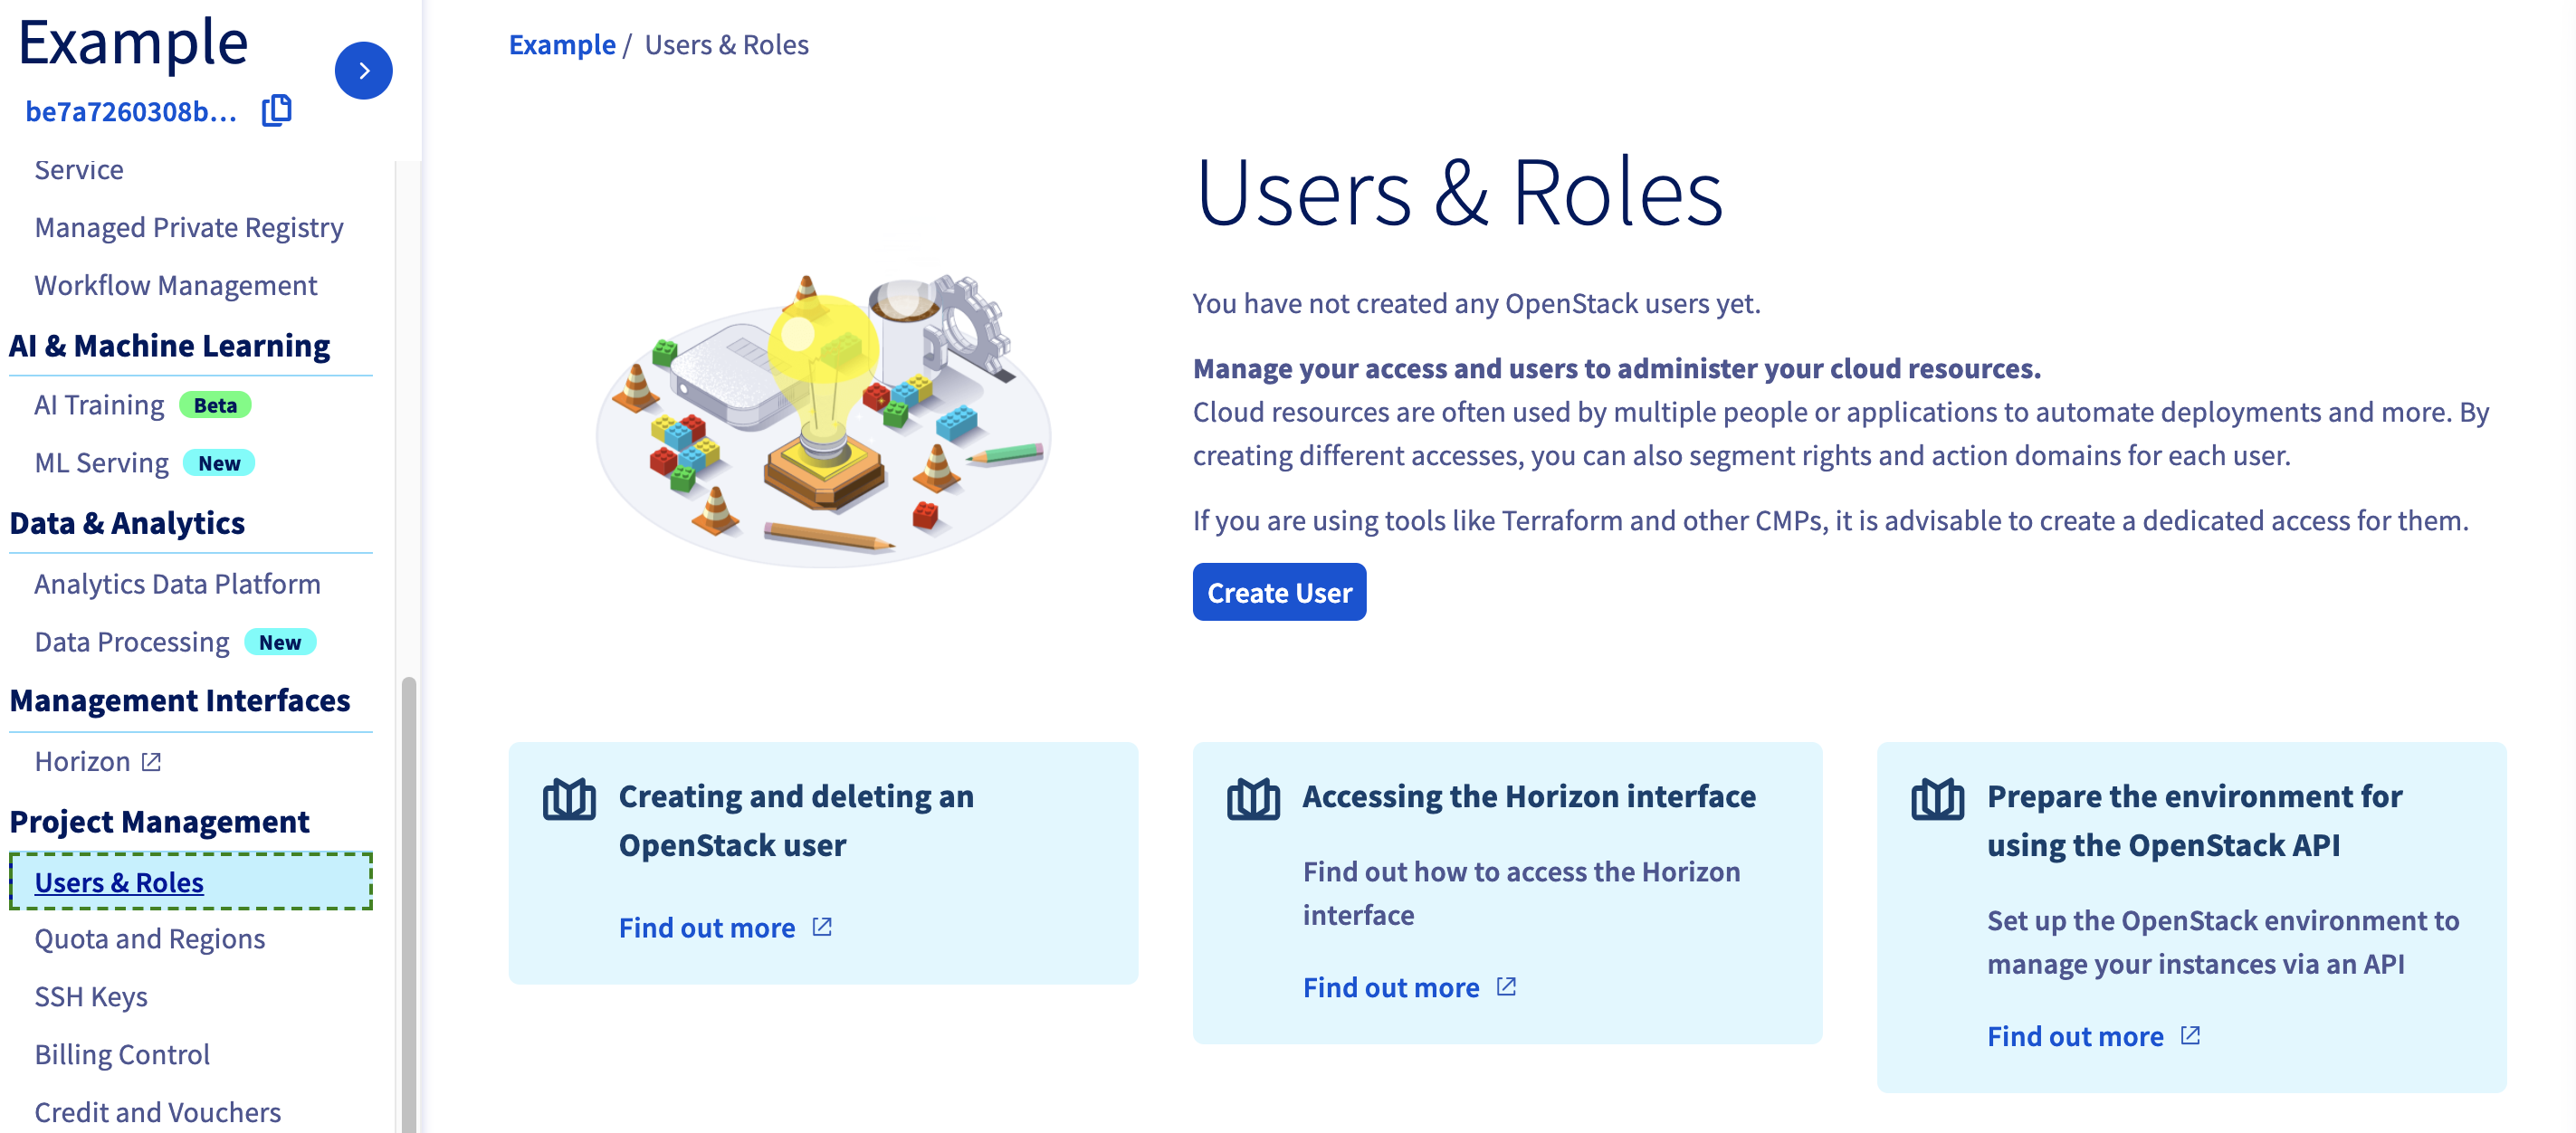
Click on the Create User call to action, then:
- Add a description (not really important)
- Add at least ObjectStore operator as Role
The new user has been added and should be ready soon. Don’t forget to note the generated password, which we’ll be used in our configuration (you can generate a new password later by clicking on the three dots at the end of the user line).
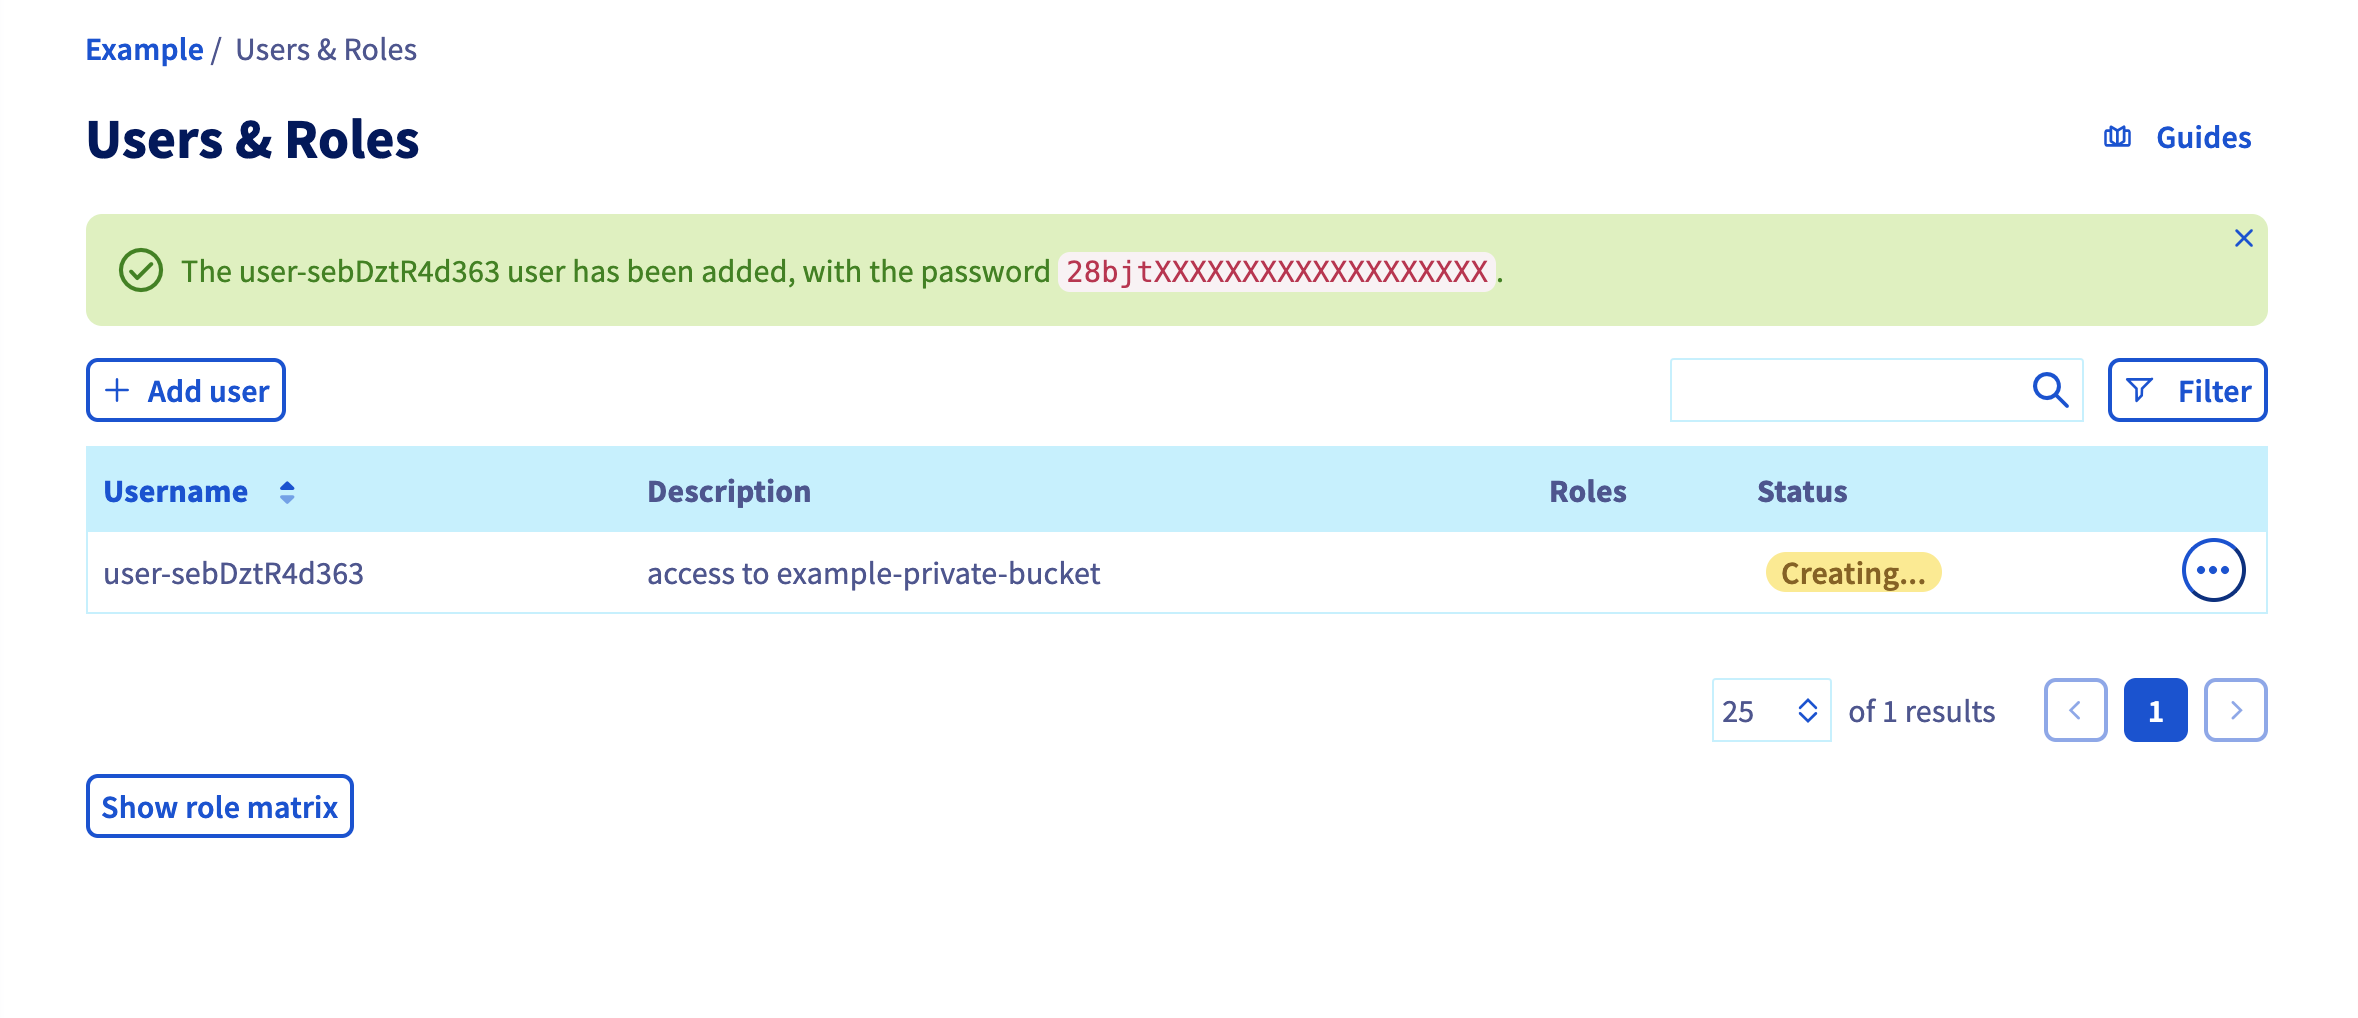
(The password in the screenshot has been obfuscated ofc 🙃)
At this point, our configuration is (with the credentials extracted from the screenshot below):
ovh:
  service: OpenStack
  container: 'example-private-bucket'                   # Your bucket's name
  credentials:
    openstack_auth_url: 'https://auth.cloud.ovh.net/'   # URL of the OVH auth url
    openstack_username: 'user-sebDztR4d363'             # username created in this section
    openstack_api_key: '28bjtXXXXXXXXXXXXXXXXXXXXX'     # password created in this section
    openstack_region: 'SBG'                             # The region acronym
    openstack_temp_url_key: OVH_OPENSTACK_TEMP_URL_KEY  # TBD in 3.
It remains the temporary url key (OVH_OPENSTACK_TEMP_URL_KEY in this config).
4. Configure temporary url key
In order to create expiring URLs (required by OpenStack), you have to setup a temporary url key.
This value has to be choose by you, let’s say for the example it’ll be
SuperPrivateKeyOfDoom.
It can be done with the swift client, but it can be done with the
fog-openstack gem too (which is a dependency of activestorage-openstack,
which is nice).
Here is a working snippet (which required dotenv gem, but it can be easily
adapt if you don’t use it):
#!/usr/bin/env ruby

unless ARGV.length == 1
  print "Usage: #{$PROGRAM_NAME} temp_url_key\n"
  exit 1
end

require 'dotenv'
Dotenv.load

%w[
  OVH_OPENSTACK_URL
  OVH_OPENSTACK_REGION_NAME
  OVH_OPENSTACK_USER
  OVH_OPENSTACK_PASSWORD
].each do |key|
  if ENV[key].nil?
    print "Required key '#{key}' is missing\n"
    exit 1
  end
end

connection_params = {
  openstack_auth_url:   ENV['OVH_OPENSTACK_URL'],
  openstack_username:   ENV['OVH_OPENSTACK_USER'],
  openstack_api_key:    ENV['OVH_OPENSTACK_PASSWORD'],
  openstack_region:     ENV['OVH_OPENSTACK_REGION_NAME'],
}

require 'fog/openstack'

begin
  connection = Fog::OpenStack::Storage.new(connection_params)
  connection.post_set_meta_temp_url_key(ARGV[0])
  print "OK, please change OVH_OPENSTACK_TEMP_URL_KEY env variable with the following value: #{ARGV[0]}"
rescue Excon::Error::Unauthorized
  print 'Unauthorized, check your credentials'
  exit 2
end
This snippet is pretty straightforward: it creates a new connection object for the storage stack, with all of our settings defined below, and set (as specified by the gem) the Temp URL key.
You can run this snippet like this:
./set_ovh_openstack_temp_url_key.rb SuperPrivateKeyOfDoomIf the script succeed, you can change the value of OVH_OPENSTACK_TEMP_URL_KEY
in your configuration:
ovh:
  service: OpenStack
  container: 'example-private-bucket'                   # Your bucket's name
  credentials:
    openstack_auth_url: 'https://auth.cloud.ovh.net/'   # URL of the OVH auth url
    openstack_username: 'user-sebDztR4d363'
    openstack_api_key: '28bjtXXXXXXXXXXXXXXXXXXXXX'
    openstack_region: 'SBG'                             # The region acronym
    openstack_temp_url_key: 'SuperPrivateKeyOfDoom'
Check this link for more information on the temporary url middleware used by OpenStack.
5. 🍹
Everything should be up and running now 🚀
Have a great day 👋